
How to Dial in Espresso:
Step-by-Step Guide for Beginners
Espresso isn’t about pressing a button and hoping for caffeine. It’s precision, pressure, and a little trial-and-error. When you hear “dialing in,” it just means tweaking your grind, dose, and time until the shot tastes right. Do it properly, and you’ll pull something rich, sweet, and balanced. Do it wrong, and you’ll get 2 ounces of hot regret.
This guide will show you exactly how to dial in, step by step.
Step 1: Start with the Right Beans
- Freshness matters → Espresso punishes stale beans. Use coffee roasted within 2–3 weeks. Once you grind it, the clock’s ticking — pull the shot within minutes.
- Roast choice → Medium to medium-dark roasts are the easiest starting point. Super-light roasts need higher pressure and temps, which is harder to nail as a beginner.
👉 Translation: Don’t cheap out with six-month-old supermarket beans.

Step 2: Use Good Water
- Your shot is 90% water. If your tap water tastes like chlorine, your espresso will too.
- Use filtered water (Brita, Pur filter, or bottled spring). Avoid distilled — you need minerals for flavor and extraction.

Step 3: Grind Size = Your Crosshairs
- Too coarse = watery, sour shot.
- Too fine = bitter, choked shot.
- Start in the middle of your grinder’s espresso range.
👉 Target: About 25–30 seconds for a 1:2 brew ratio (example: 18g in → ~36g liquid out). That ratio is your baseline.

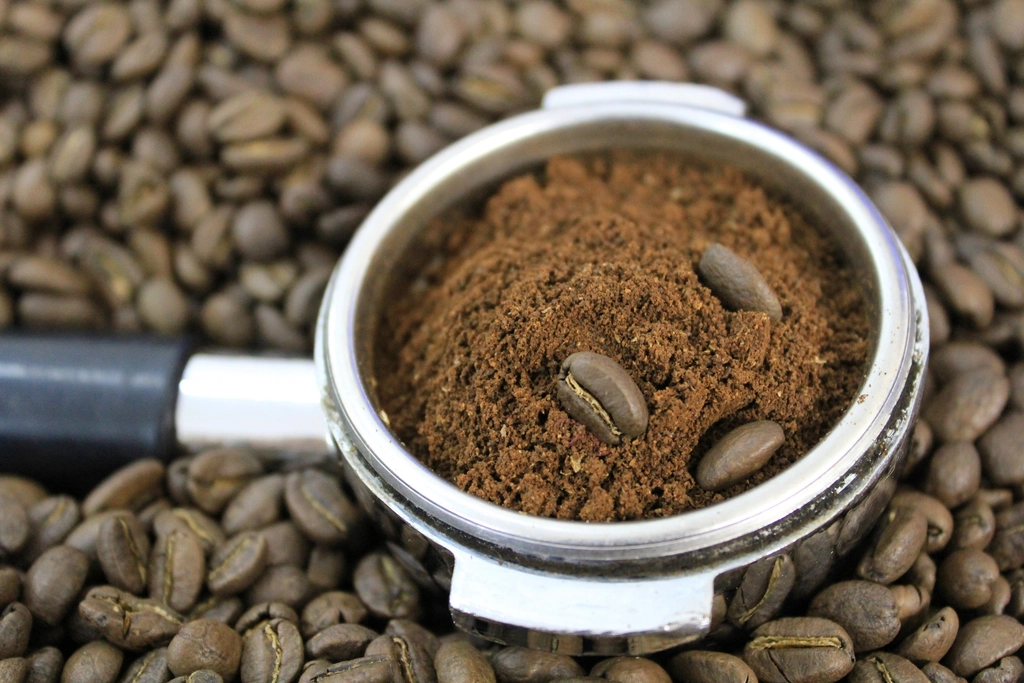
Step 4: Dose and Distribute
- Standard double shot = 18–20 grams of ground coffee.
- Use a scale — not a scoop. Scoops lie.
- Level the grounds before tamping to prevent “channeling” (water blasting through weak spots).
Step 5: Tamp with Consistency
- Press straight down with ~30 lbs of pressure.
- Even and level. Don’t twist. Don’t lean. Think “firm handshake,” not “Hulk smash.”
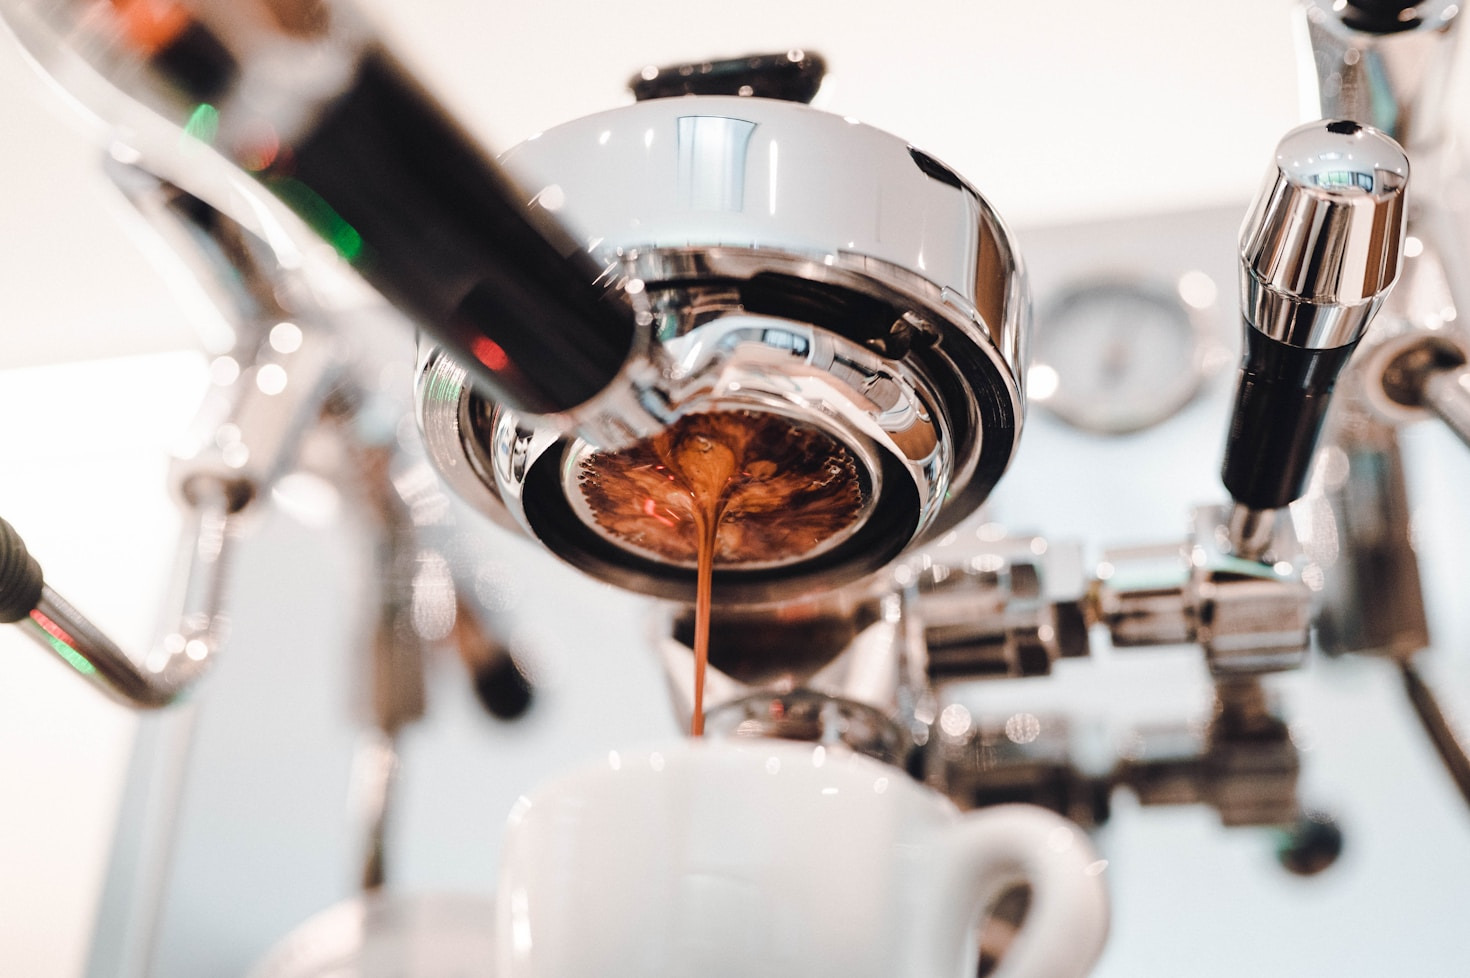
Step 6: Pull the Shot
- Lock in the portafilter, hit the button.
- Watch the flow: it should start dark, turn golden, and finish before it blonds out.
- Stop around 25–30 seconds, yielding ~36g liquid for 18g in.
Step 7: Taste Test and Adjust
- Sour/lemony → Under-extracted. Grind finer.
- Bitter/astringent → Over-extracted. Grind coarser.
- Flat/no crema → Stale beans, bad tamp, or wrong grind.

Quick Troubleshooting Table
| Problem | Likely Cause | Fix |
|---|---|---|
| Shot gushes out in 10s | Grind too coarse | Go finer |
| Shot takes 45s+ | Grind too fine | Go coarser |
| Channeling (sprays, uneven flow) | Uneven tamp/distribution | Level and tamp better |
| No crema | Stale beans or wrong grind | Fresh beans, dial in grind |
Optional: Milk Steaming Basics
Most beginners don’t stop at espresso — they want lattes and cappuccinos. A quick primer:
- Purge the wand first (blow out water).
- Submerge just under the surface → stretch milk with a paper-tearing sound.
- Once warm, bury the wand deeper to swirl.
- Aim for glossy microfoam, not bubble bath suds.

Gear That Makes Life Easier (Affiliate Picks)
- Grinder → Baratza Encore ESP – consistent grind, built for espresso.
- Scale → Digital scale with a timer = two birds, one stone. Example: this one
- Machine → Breville Bambino Plus – compact, beginner-friendly, gets you in the game.
- Milk Pitcher → 12oz stainless pitcher – cheap, durable, perfect for learning microfoam.
Bottom Line
Dialing in espresso is repetition. You’re not going to nail it on the first pull, and that’s the point. Adjust grind, dose, and time until you find the sweet spot, then lock it in and repeat. Think of it like zeroing a rifle: the first few shots are just adjustments. Once it’s dialed, you hit the bullseye every time.
Leave a Reply